


Stop and Start VM using Azure Function
Automation with Azure Serverless Functions and PowerShell


I recently had the opportunity of helping a client automate "stop" and "start" operations on his Azure Virtual Machine. Seeing how happy he was, I decided to share this knowledge with everyone else.
In this article, I will provide you step by step guide on how to automate a stop and start VM operation using Azure Functions.
Make a cup of coffee, and let us have some fun time.
If you are new to Azure cloud, then create a free Azure account
Prerequisites
- An Azure Cloud Account
- Azure Function App with a PowerShell Core Runtime language. (this will enable us to use the Az PowerShell module).
- An Azure Virtual machine.
Let us start by creating the Function App.
Create Azure Function App
Navigate to the Azure portal here
Enter the following parameters. Feel free to choose any name for the resource group and function name fields. However, it is best practice to choose a name that helps in identifying resources.
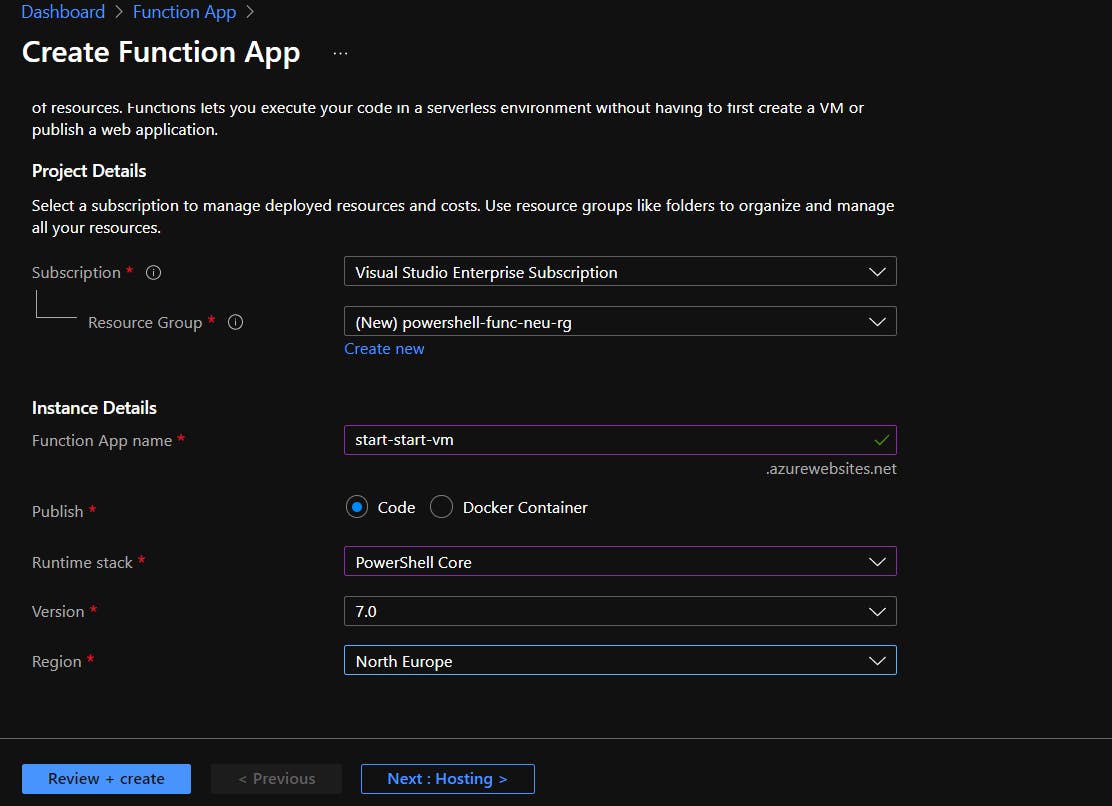
Afterwards, click on Next: Hosting

Under the operating systems field, select Windows and choose consumption plan (serverless) as the Hosting plan type
Afterward, proceed to the Review + create a tab by clicking Next

Then click Create.
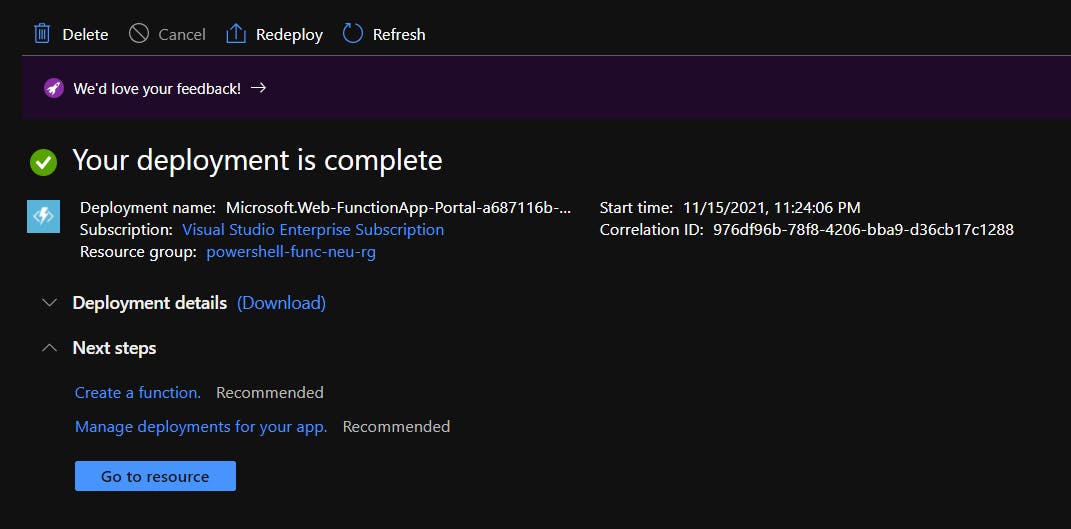
Click on Go to resource
Configure the System managed Identity for the Function App
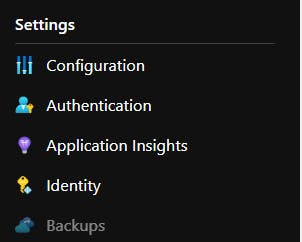
On the sidebar menu of the Function App page, under the settings section, click on the identity
Managed identities provide an identity for applications to use when connecting to resources that support Azure Active Directory (Azure AD) authentication.
Managed Identity helps to eliminate the hassle that developers face in the Management of secrets and credentials used to secure communication between different components.
In this case, we want to create a managed identity access for the Function App to allow access to the virtual machine resource. Sounds good? , okay let us proceed.
Under the system assigned tab, toggle the status from OFF to ON, then save.
After you click on save, the following section will become available

Click Azure role assignment.
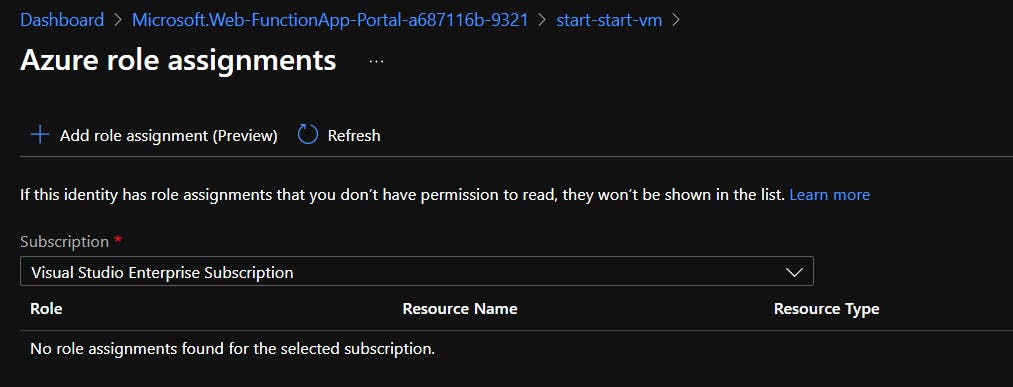
Next, select Add role assignment (preview)
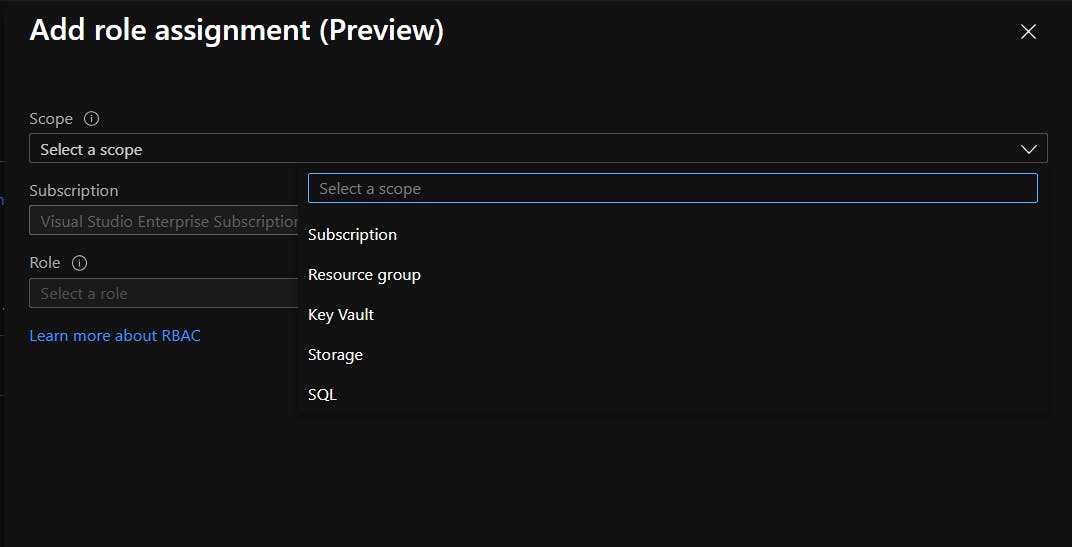
There are three steps to consider here:
- On the pane, select Subscription as the scope
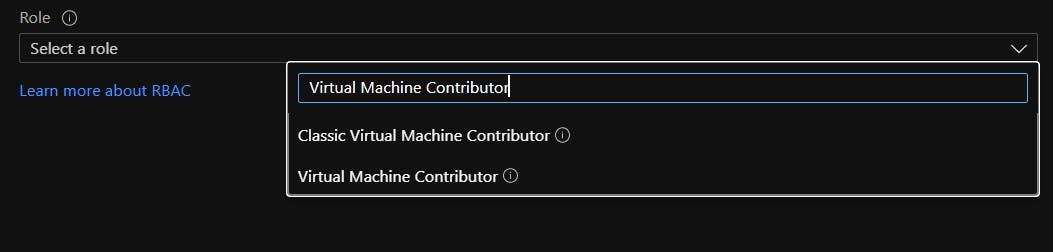
- Under the role section, type in Virtual Machine Contributor( following the principle of least privilege).
- Click Save
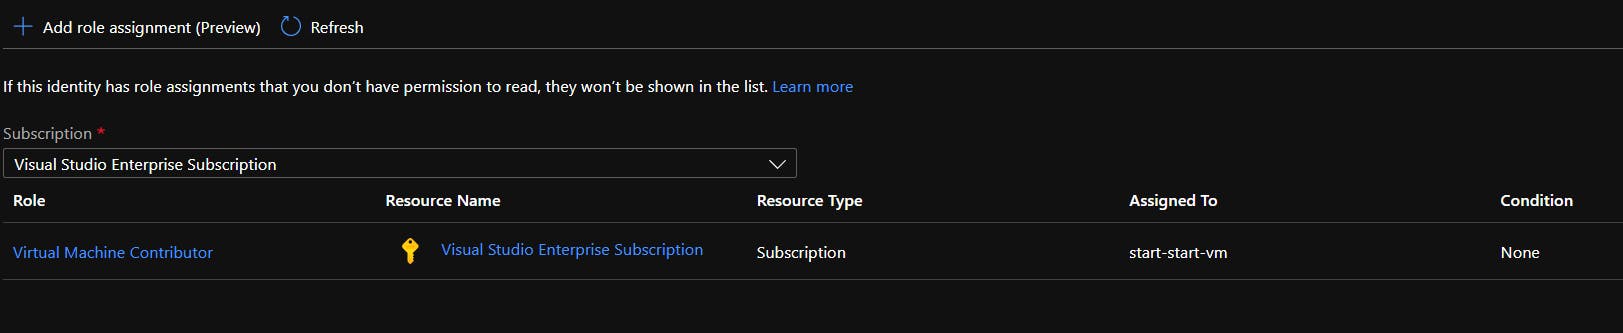
Afterward, you should see the Assigned role displayed.
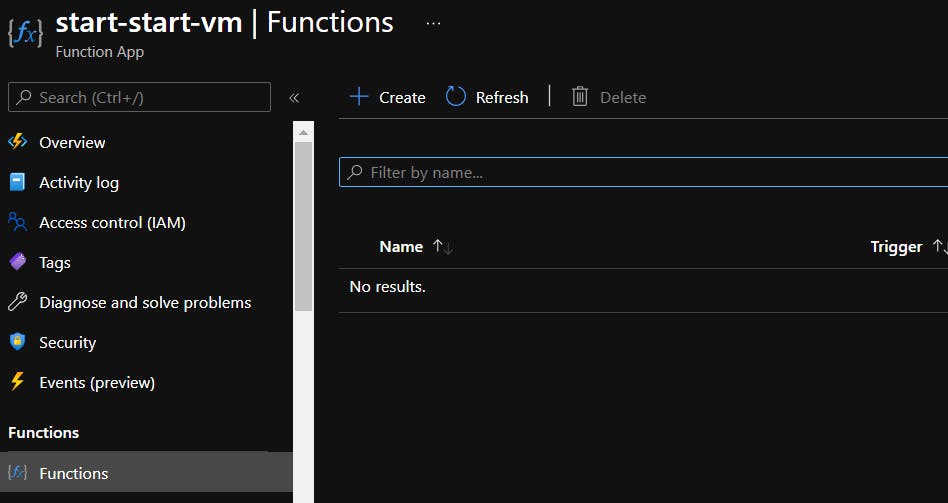
Navigate back to the Function App page, on the sidebar click Function and + Create a Function.
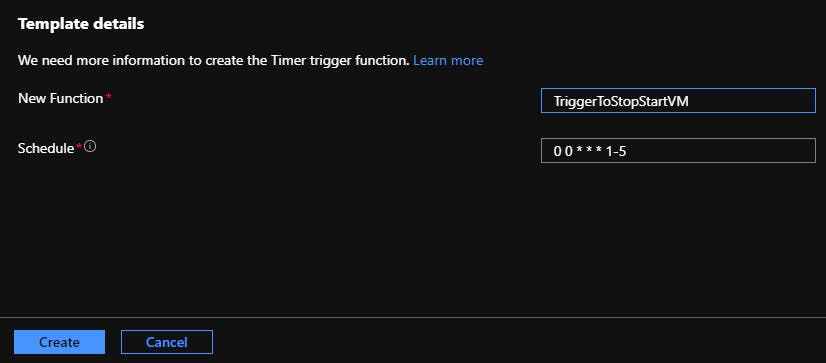
Select Timer Trigger, scroll down and set the desired CRON expression for your timer trigger.

Preferably, configure the Function to Trigger every hour.
I choose to use the CRON expression 0 0 * * * 1-5, which means my Function will trigger every hour, Monday to Friday of every week and every month of the year.
Azure uses NCRONTAB expression for Timer Triggers. NCRONTAB uses six inputs instead of five, with the extra input representing seconds. e.g., 0 0 * * * 1-5.
{second} {minute} {hour} {day} {month} {day-of-week}
You can check out Azure documentation on NCRONTAB
Are you worried that you may incur a high bill? I've got good news for you.
Azure Functions consumption plan is billed based on per-second resource consumption and executions. Consumption plan pricing includes a monthly free grant of 1 million requests and 400,000 GB-s of resource consumption per month per subscription in pay-as-you-go pricing across all function apps in that subscription.
After successful creation of the Function, click on Code + Test
Paste the PowerShell code below into the editor, modify the subscription to include your valid subscription, and click save.

# Input bindings are passed in via param block.
param($Timer)

# Add all your Azure Subscription Ids below
$subscriptionids = @"
[
    "xxxxxxxxxxxxxxxxxxxxxxxxxxxxxxx"
]
"@ | ConvertFrom-Json

# Convert UTC to Custom Time zone. In my case, W. Central Africa Standard Time
$date = [System.TimeZoneInfo]::ConvertTimeBySystemTimeZoneId([DateTime]::Now,"W. Central Africa Standard Time")

foreach ($subscriptionid in $subscriptionids) {
    # Selecting Azure Sub
    Set-AzContext -SubscriptionId $Subscriptionid | Out-Null

    $CurrentSub = (Get-AzContext).Subscription.Id
        If ($CurrentSub -ne $Subscriptionid) {
            Throw "Switching to SubscriptionID: $Subscriptionid failed"
        }

    $vms = Get-AzVM -Status | Where-Object {($_.tags.Shutdown -ne $null) -and ($_.tags.StartVM -ne $null)}
    $now = $date

    foreach ($vm in $vms) {

        if ( ($vm.PowerState -eq 'VM running') -and ( $now -gt $(get-date $($vm.tags.Shutdown)) ) -and ( $now -lt $(get-date $($vm.tags.Shutdown)).AddMinutes(5) ) ) {
            Stop-AzVM -Name $vm.Name -ResourceGroupName $vm.ResourceGroupName -Confirm:$false -Force
            Write-Warning "Stop VM - $($vm.Name)"
        }
        elseif ( ($vm.PowerState -eq 'VM deallocated') -and ( ($now -gt $(get-date $($vm.tags.StartVM) ) ) -and ( $now -lt $(get-date $($vm.tags.StartVM)).AddMinutes(5) ) ) ) {
            Start-AzVM -Name $vm.Name -ResourceGroupName $vm.ResourceGroupName
            Write-Warning "Start VM - $($vm.Name)"
        }
    }

}
What is PowerShell?
PowerShell is a cross-platform task automation solution. It is a scripting language and a configuration management framework that can run on Windows, Linux, and macOS.
As a scripting language, PowerShell is used in automating the management of systems.
On the code above, we have a variable declaration, nested "foreach" statements, and conditional statements.
The Get-AzVM command is a PowerShell command used to retrieve the properties of a Virtual machine.
The if..elseif... condition checks for the PowerState of the VM. If the VM is running and the time is greater than the value set in the Virtual machine Tag, we want to Stop the VM and vice versa.
For a complete reference to the PowerShell tags used, see PowerShell docs
PowerShell gives us the control to system properties and settings. It is a significant language for automation and is one of my favorites.
Before we continue, you should take a sip from your coffee.
Does it still taste good? I hope so. Now, let us continue.
Enable Az PowerShell module
Navigate back to the Function App page, on the sidebar menu, click App Files under the Functions section
Click on the dropdown menu and select requirement.psd1.
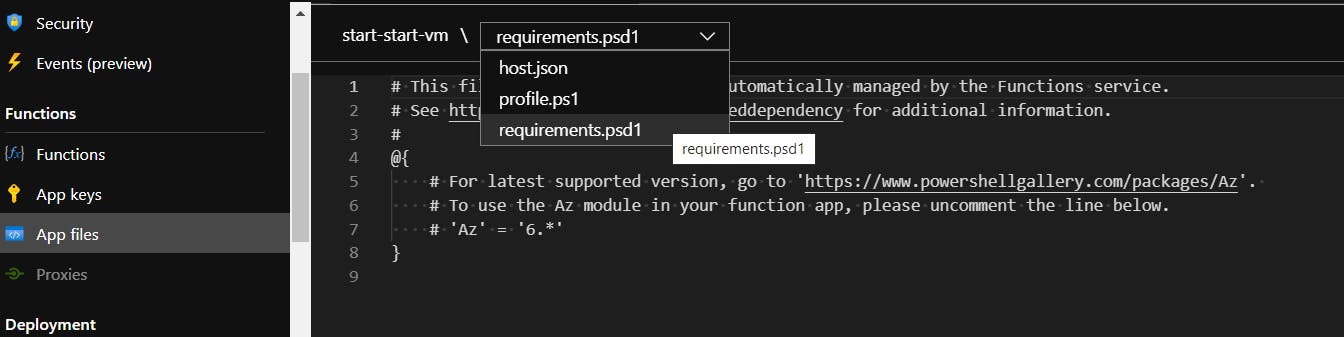
On the requirement.psd1 file, uncomment line 7 by removing the # sign.
This will allow the Function to use the Az module. Click Save
Create an Azure Virtual Machine
Now, create your virtual machine by following the easy prompt. here
On successful creation of the machine, navigate to the Virtual machine's overview page, Select Tag(change)
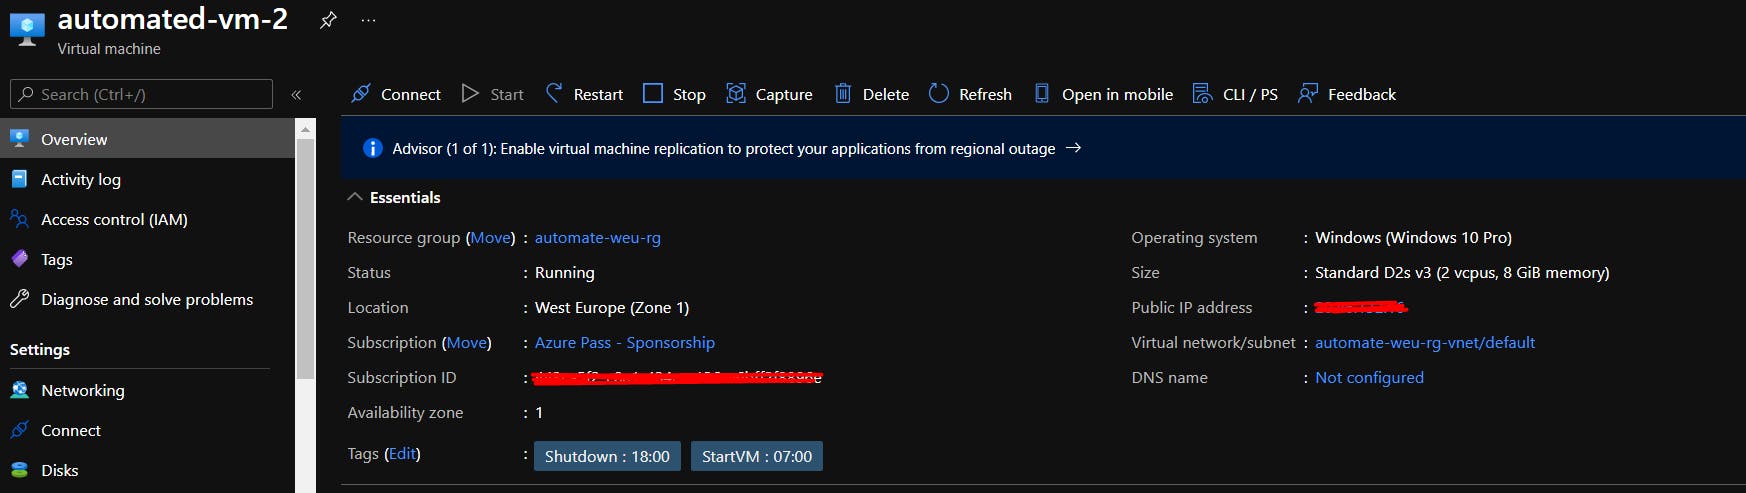
Create Tags for your virtual machine
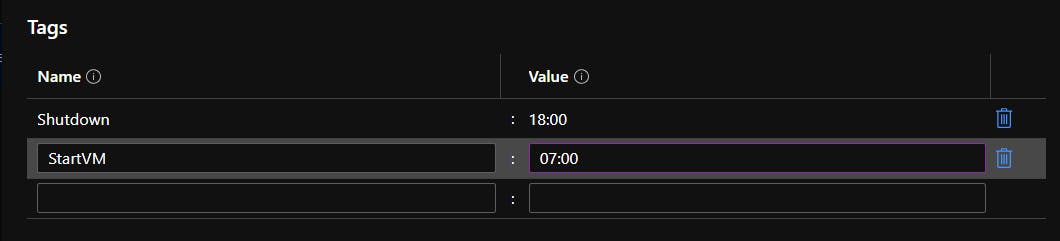
Create the following Tags (recall the names of the Tags created in our PowerShell code section above, those are the names you want to input here). I.e. Shutdown and StartVM

Before you proceed, please keep in mind that the numbers in a CRON expression refer to a time and date, not a period. For example, if I have a 5 in the hour field, it indicates 5:00 AM and not every 5 hours.
Note:
- The default time zone used with the CRON expressions is Coordinated Universal Time (UTC). However, we converted our time zone from UTC to W. Central Africa Standard Time and can now input values in the tags using W. Central Africa Standard Time.
Afterward, Save.
When it is time for the Virtual Machine to shut down(as configured in the tag), the timer would trigger. You can navigate to the Activity logs section of the Virtual machine sidebar menu
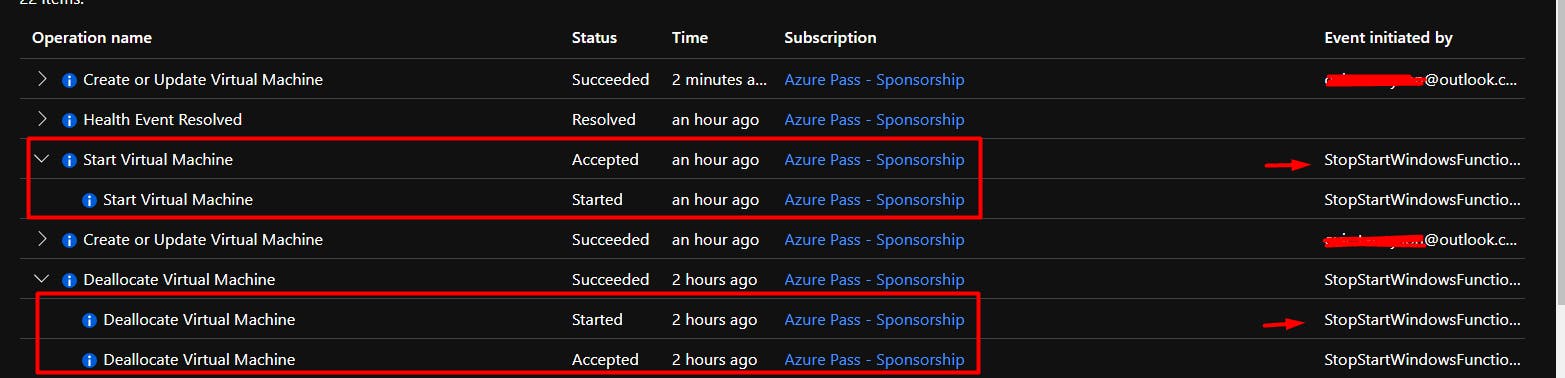
You can see the Virtual machine was shut down and started by the Function App.
Conclusion
We have successfully created a start-and-stop automation for our Virtual machine. The auto-stop and auto-start options are available on every Virtual machine by default. However, by using the Azure Function App (consumption plan) and timer trigger to perform this operation, it saves you cost. Reference to pricing for consumption plan .
Thanks for taking the time to read and implement with me.
Watch out for my next post Authenticating Azure Static Web App with Single AAD Tenant.